Building a real-time transit information kiosk with Raspberry Pi
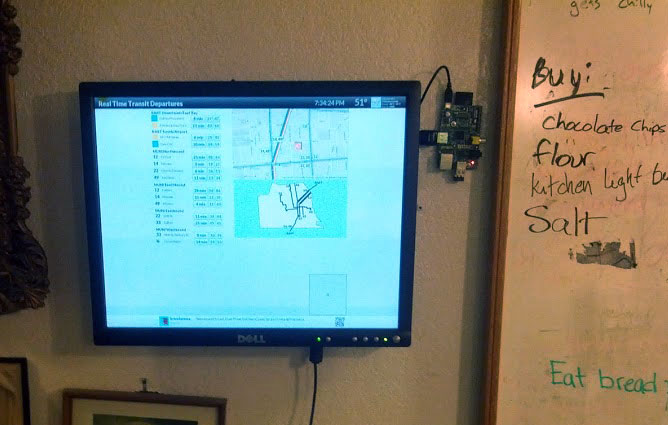
I've been playing with raspberry pi a lot lately and managed to make a real-time transit display for my kitchen. This shows the real-time arrival predictions for the transit routes near me, a map of the stops, the weather, and recent tweets from my roommates.
It was surprisingly easy to set up, so I'll post the steps:
1. Get a raspberry pi
Raspberry pi's are really popular, so it has been tricky to find a distrubutor with them in stock. I was able to purchase one in the US from MCM Electronics for $35.
2. Get some parts
You'll need a few other parts, but you may already have some of these laying around:
-
HDMI to DVI cable - $3.23
-
Wireless USB Adapter - $7.44 (unless you want to keep your display plugged in via ethernet)
-
MicroUSB cable - $0.72
-
USB Wall charger - $6.15
-
A monitor with DVI input (get a small used one on craigslist, or take the one out of your basement)
You'll also need the following for setup purposes:
- A computer
- SD Card Reader - $6.14 - (your computer may have one built in)
- USB Keyboard
- USB Mouse
3. Get Raspbian
Download and install Raspbian (the Raspberry pi OS) to the SD Card. If you want to skip this step, you can buy SD cards with Raspbian pre-installed.
- Download Raspbian - I used 2012-12-16-wheezy
- Setup the card - this depends on your OS
- Put the card in your pi
4. Set up the pi
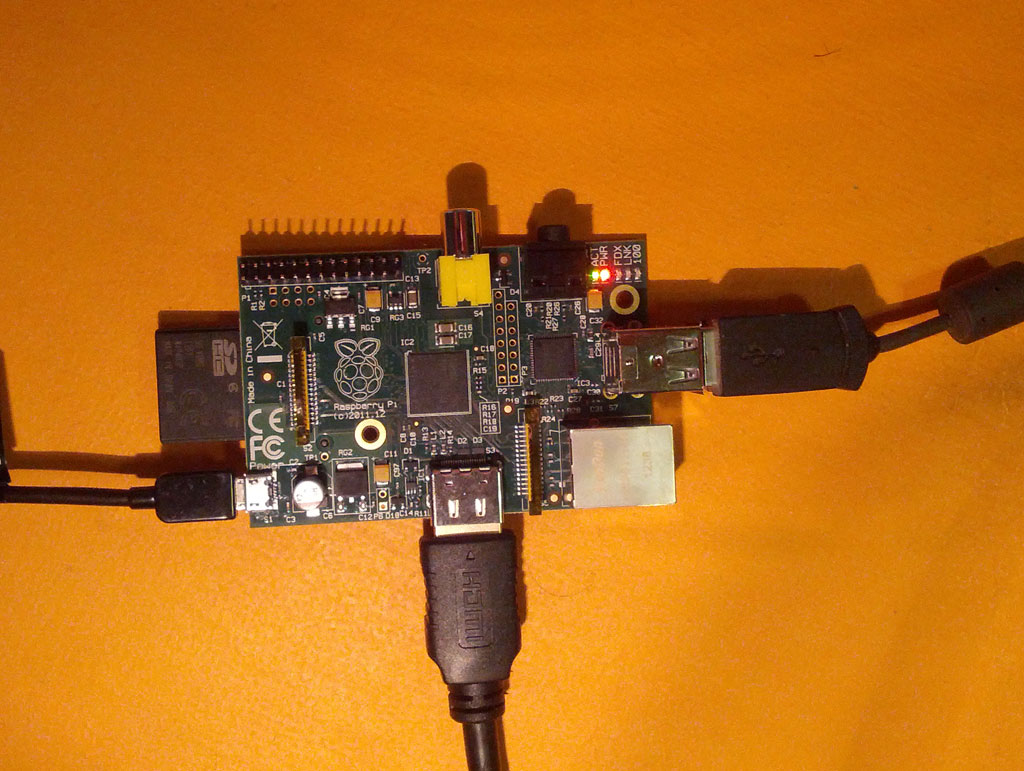 Once you have raspbian installed, put the SD card in your pi, connect the power microUSB to power, connect the keyboard and mouse and connect the HDMI cable to the DVI port on your monitor. You'll also want to connect it to the internet via eithernet for this initial setup. The Raspberry pi will power on automatically and if you are lucky you'll see the raspi-config setup screen.
You'll want to do the following setup:
- "expand-rootfs" - Expand root partition to fill SD card
- "change_pass" - Change password for 'pi' user
- "change_locale" - Change the locale to your area (default is Great Britain)
- "change_timezone" - Set your timezone
- "boot_behaviour" - Set to boot to Desktop on boot
- "update" - update raspi-config
After this, select "Finish" and then reboot the pi: [gist id=4506639]
5. Make the pi a kiosk
Thanks to Nicolò Paternoster's instructions on pikiosk.tumblr.com
When you restart your pi you'll be asked the log in. The default username is "pi" and the default password is "raspberry" - although you may have changed that in the above step.
First we want to update the pi and install chromium (our browser) and x11-server-utils and unclutter to make the cursor disappear. This will take a while. [gist id=4506699]
Next, we want to update the pi so that it doesn't show the screensaver and it automatically loads chromium in kiosk mode with our transit display on startup. Edit '/etc/xdg/lxsession/LXDE/autostart': [gist id=4506713]
Comment out the line with '@xscreensaver -no-splash' using a # [gist id=4506719]
Add the following lines, but replace the URL in the last one with the URL that you'd like to display. [gist id=4506727]
If you are connecting it to a monitor via DVI, you may want to force the pi to use its HDMI output (and not default to RAC). Edit '/boot/config.txt': [gist id=5298475]
Now, we'll setup the wireless. We installed xvkbd, a virtual keyboard, so you can unplug the USB keyboard and plugin the USB wireless card.
- Open the virtual keyboard xvkbd
- Click on the Wifi Setup icon on the desktop
- Click "Scan", select your wireless network
- Using the virtual onscreen keyboard, type in the wireless password
Restart the pi, and you are done. [gist id=4506639]
6. Access the display remotely
From the same network, you can SSH to the pi. First you have to figure out what its IP address is. You can do this using nmap or by logging into your router and showing all clients on your network. [gist id=5400526]
Once you've successfully connected, you may want to reboot: [gist id=4506639]
You may want to restart chromium at some point: [gist id=5400591]
7. Customize the display
All of the pi-specific stuff is done, but you need to choose what actually gets displayed. You can use my BART realtime display kiosk page or grab the source. You can link directly to a specific station's page using '?station=16TH' after the url.
I also created a more detailed realtime display combining MUNI and BART for the Mission - feel free to modify it as needed to make it specific to your location. Alternatively, you could simply point to nextbus directly.
8. Extend this
There is a lot more you could do, including using 3G instead of wifi, allowing user input, using motion detection to do something when someone walks by or even print a timetable/map using a receipt printer.